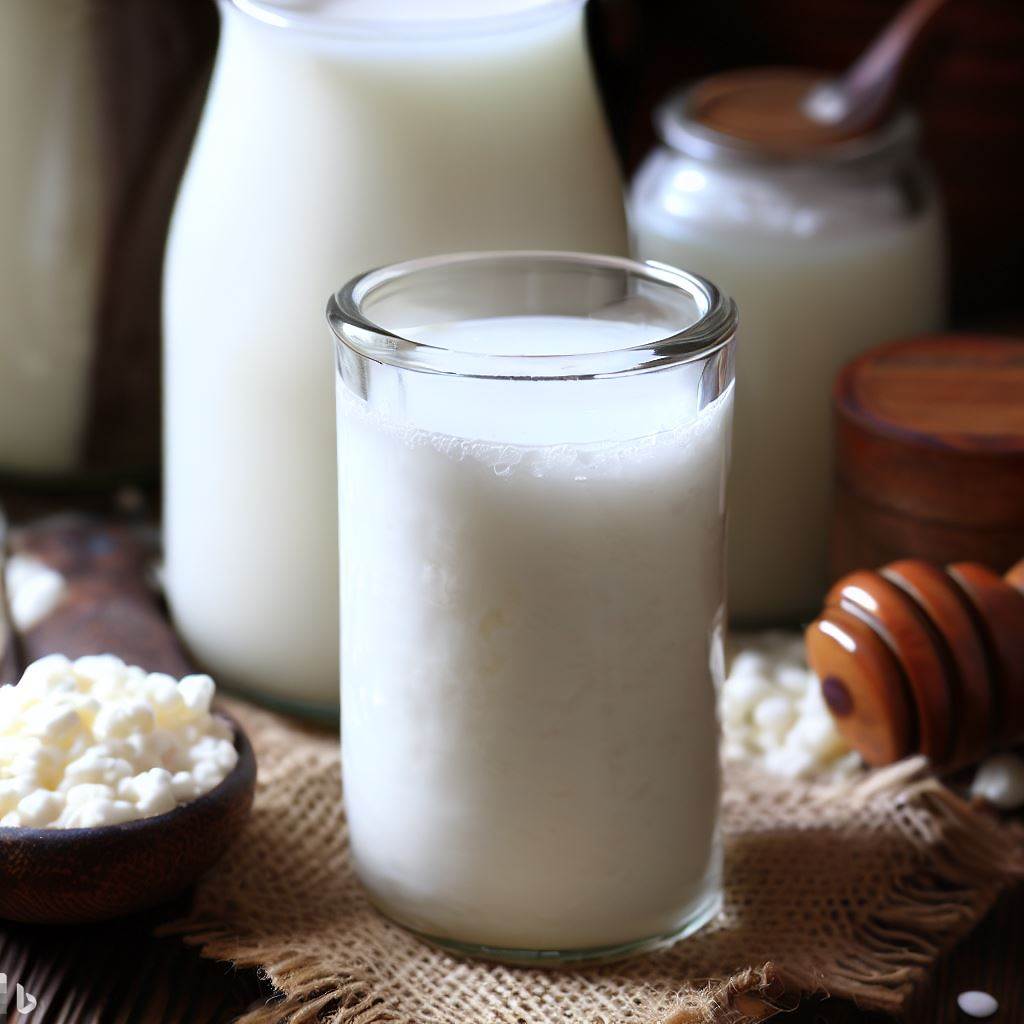
Kefir is a fermented milk drink with a tangy taste and a creamy texture, has gained popularity for its numerous health benefits. This blog post will guide you through the process of brewing it at home, enabling you to enjoy the rich flavors and probiotic goodness it offers. Whether you’re new to kefir or an experienced home brewer, this guide will provide you with the knowledge and tips you need to create your own delicious brew. Kefir, How to Make it? Lets dive in!
The Ultimate Milk Kefir Brewing Guide: How to make Delicious and Nutritious Brewing at Home

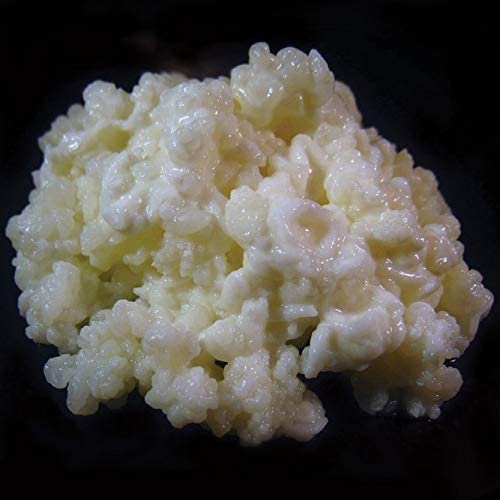
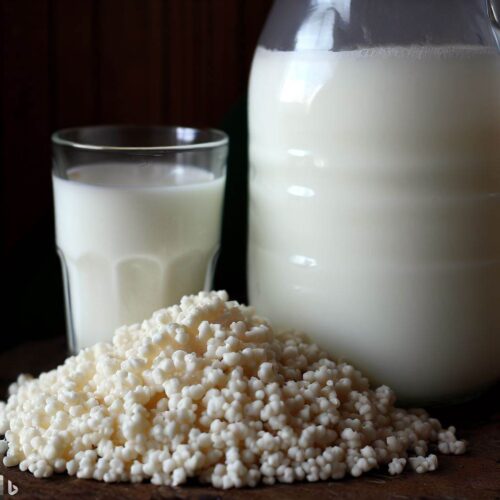
Kefir originates from the Caucasus Mountains and is believed to have been consumed for thousands of years. It is made by fermenting milk with kefir grains, which are composed of a mixture of bacteria and yeast. The fermentation process breaks down lactose in the milk and transforms it into lactic acid, giving it its characteristic tangy flavor.
The Benefits of Milk Kefir
Kefir is renowned for its potential health benefits. It is an excellent source of probiotics, which are beneficial bacteria that promote a healthy gut microbiome. Regular consumption of the drink may improve digestion, boost the immune system, and enhance nutrient absorption. Sounds pretty similar to Kombucha, right? Additionally, it is rich in vitamins, minerals, and essential amino acids, making it a nutrient-dense beverage.
Importance of Brewing Milk Kefir at Home
Brewing kefir at home allows you to have complete control over the ingredients and fermentation process. Store-bought kefir often contains added sugars, flavors, and preservatives, which can diminish its health benefits. By brewing it yourself, you ensure the use of high-quality ingredients and can tailor the fermentation to your taste preferences.
II. Getting Started with Milk Kefir Brewing
To embark on your brewing journey, you’ll need to acquire kefir grains and gather the necessary equipment. Let’s explore the options available and learn how to prepare the brewing environment.
A. Acquiring Kefir Grains
- Purchasing Kefir Grains
One way to obtain kefir grains is by purchasing them from reputable sources. There are online stores that specialize in selling kefir grains, ensuring their quality and viability. When purchasing kefir grains, look for well-reviewed sellers who provide detailed instructions on handling and activating the grains. Our reccomended option has 4.6 stars on Amazon and comes with an eBook!
- Obtaining Kefir Grains from a Friend or Online Community
Another option is to obtain kefir grains from a friend, family member, or an online kefir brewing community. Kefir grains have a unique ability to multiply during fermentation, resulting in an excess that can be shared with others. Joining online communities or forums dedicated to kefir brewing can help you connect with individuals who are willing to share their extra grains.
B. Equipment Needed for Kefir Brewing
Before diving into kefir brewing, gather the following equipment:
- Glass Jars
Glass jars are ideal for kefir brewing because they are non-reactive and easy to clean. Choose jars of appropriate sizes to accommodate the volume of kefir you wish to brew. You can use the same 1 Gallon Jars you use for Kombucha!
- Plastic or Wooden Stirring Spoons
When handling kefir grains, avoid metal utensils, as they may react with the grains and impact the fermentation process. Instead, use plastic or wooden stirring utensils to mix the kefir.
- Breathable Coverings
During fermentation, kefir needs to “breathe” while being protected from contaminants. Use breathable coverings like cheesecloth or coffee filters secured with rubber bands to allow airflow while keeping unwanted elements out.
- Strainer
A fine-mesh strainer is essential for separating the kefir grains from the fermented milk. Choose a strainer that effectively strains out the grains while allowing the liquid kefir to pass through. A yogurt strainer is a good option for this.
C. Preparing the Brewing Environment
To ensure a successful kefir brewing process, pay attention to the following considerations:
- Cleanliness and Sterilization
Maintaining cleanliness throughout the brewing process is crucial. Clean all equipment and jars with hot, soapy water before use. Rinse them thoroughly to remove any soap residue. Additionally, sterilize the jars and utensils periodically by boiling them in water for a few minutes.
- Choosing the Right Location
Find a suitable location for fermenting your kefir. Ideally, it should be away from direct sunlight and extreme temperature fluctuations. A cool, dark corner of your kitchen or pantry is often an ideal spot.
- Temperature Considerations
Kefir fermentation thrives at a moderate temperature range. Aim for a temperature between 68°F and 78°F (20°C and 25°C) topromote optimal fermentation. Avoid extreme heat or cold, as it can affect the fermentation process and the health of the kefir grains.
III. Brewing Kefir: Step-by-Step Guide
Now that you have your kefir grains and equipment ready, let’s dive into the step-by-step process of brewing kefir. This section will guide you through activating the kefir grains, the first fermentation, straining and separating the grains, and the optional second fermentation for flavor development.
A. Activating the Kefir Grains
- Rehydrating Dried Kefir Grains
If you have acquired dried kefir grains, you’ll need to rehydrate them before they become active. Follow these steps:
- Place the dried kefir grains in a glass jar.
- Add fresh milk at room temperature, covering the grains completely.
- Stir gently to ensure the grains are evenly distributed.
- Cover the jar with a breathable covering and secure it with a rubber band.
- Allow the grains to rehydrate for 24 to 48 hours, stirring occasionally.
- Once the grains have plumped up and become creamy in appearance, they are ready for use.
- Activating Dehydrated Kefir Grains

In some cases, you may come across dehydrated kefir grains. Follow these steps to activate them:
- Place the dehydrated kefir grains in a glass jar.
- Add fresh milk at room temperature, covering the grains completely.
- Stir gently to ensure the grains are evenly distributed.
- Cover the jar with a breathable covering and secure it with a rubber band.
- Allow the grains to activate for 3 to 7 days, stirring occasionally.
- Once the grains start to multiply and create a thick texture in the milk, they are ready for use.
B. First Fermentation
The first fermentation is the primary stage where kefir grains are added to milk, initiating the fermentation process. Follow these steps for a successful first fermentation:

- Choosing the Right Milk
Kefir can be brewed with various types of milk, including cow’s milk, goat’s milk, and plant-based alternatives like coconut milk or almond milk. It’s important to choose organic, high-quality, fresh milk without added preservatives or ultra-pasteurization, as these can hinder fermentation.
- Milk-to-Kefir Grain Ratio
To start, use a ratio of 1 to 2 tablespoons of kefir grains per 1 cup of milk. Adjust the amount of milk and grains based on the desired quantity of kefir you want to brew.
- Mixing and Covering the Jar
Pour the milk into a glass jar and add the kefir grains. Stir gently to ensure the grains are evenly distributed throughout the milk. Cover the jar with a breathable covering and secure it with a rubber band.
- Fermentation Time and Temperature
Place the jar in the chosen brewing location and let it ferment for 24 to 48 hours. The fermentation time can vary depending on the ambient temperature and the desired level of tanginess. Warmer temperatures will result in faster fermentation, while cooler temperatures will slow it down.
C. Straining and Separating Kefir Grains
After the first fermentation, it’s time to separate the kefir grains from the liquid kefir. Follow these steps:
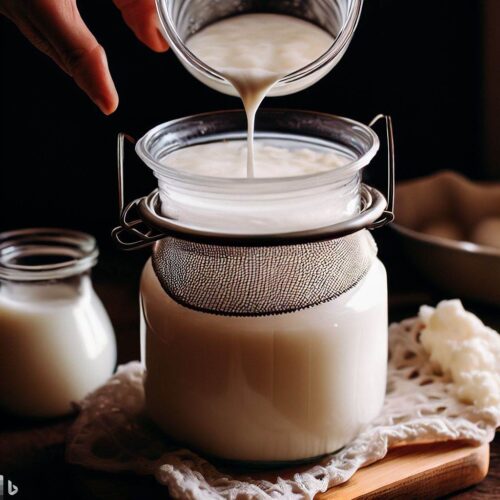
- Using a Strainer to Separate Grains
Position a fine-mesh strainer over a clean container or another glass jar. Pour the fermented kefir through the strainer, allowing the liquid to pass through while trapping the kefir grains in the strainer. Gently tap or shake the strainer to facilitate the separation process.
- Rinse and Reuse the Jar
Once the grains are separated, rinse the glass jar used for fermentation with cold water to remove any remnants. This step ensures a clean environment for the next batch. Return the grains to the freshly rinsed jar for the next fermentation cycle.
D. Second Fermentation
The optional second fermentation is where you can infuse your kefir with additional flavors and enhance its nutritional value. Follow these steps for a delightful second fermentation:
- Flavoring Options
During the second fermentation, you have the freedom to experiment with various flavor combinations. Consider adding fruits, herbs, or spices to create a unique taste profile. Common flavoring options include berries, citrus zest, vanilla extract, ginger, or cinnamon.
- Adding Fruits, Herbs, or Spices
After separating the grains, pour the strained kefir into smaller glass jars, leaving some headspace for expansion during fermentation. Add your desired flavorings to each jar. For fruits, chop them into small pieces before adding. For herbs or spices, add them directly or create a tea infusion by steeping them in hot water and letting the mixture cool before adding it to the jars.

- Fermentation Time for Flavor Development
Seal the jars tightly and allow them to ferment for an additional 12 to 24 hours. The second fermentation intensifies the flavors and develops carbonation. Keep a close eye on the jars, as the buildup of carbonation may cause the lids to pop open if not released periodically.
IV. Storing and Maintaining Kefir Grains
When you have surplus kefir grains or need to take a break from brewing, proper storage and maintenance are essential to keep the grains healthy and viable. Let’s explore how to store and revive kefir grains.
A. Resting Kefir Grains
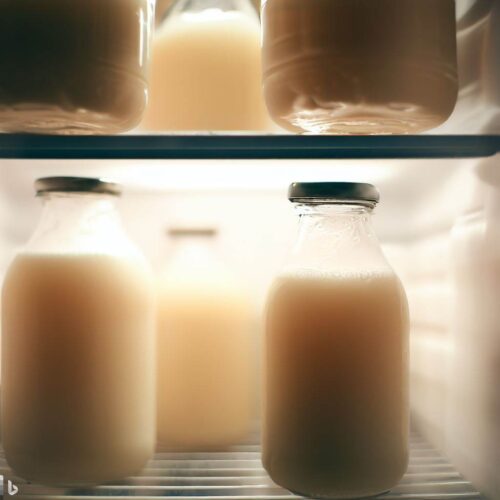
- Storing Grains in the Refrigerator
If you want to slow down the fermentation process, store your kefir grains in the refrigerator. Place the grains in a small glass jar and cover them with milk. Change the milk every 1 to 2 weeks to ensure the grains receive fresh nutrients. The refrigerated grains can remain dormant for several weeks or even a couple of months.
- Storing Grains in a Temporary Solution
Alternatively, if you need to take a short break from brewing, you can store the kefir grains in a temporary solution. Prepare a saltwater solution by dissolving 1 teaspoon of non-iodized salt in 1 cup of water. Transfer the grains into the solution and store them in a cool place. Remember to rinse the grains thoroughly with fresh water before resuming kefir brewing.
V. Troubleshooting Common Issues
Even experienced kefir brewers encounter challenges from time to time. Let’s explore some common issues that may arise during the brewing process and the possible solutions to overcome them.
A. Separation of Kefir
- Causes and Solutions
If your kefir separates into curds and whey during fermentation, it’s usually a sign of over-fermentation.To resolve this issue, try the following:
- Shorten the fermentation time: Reduce the fermentation time by a few hours to prevent over-fermentation.
- Adjust the temperature: If the ambient temperature is high, kefir may ferment faster. Try moving the jar to a cooler spot to slow down the fermentation process.
- Use a different milk-to-grain ratio: Experiment with adjusting the milk-to-grain ratio. Using fewer grains or more milk can help regulate fermentation and prevent separation.
B. Sluggish Fermentation
- Factors Affecting Fermentation
Sluggish fermentation can occur due to various factors, including:
- Temperature: If the ambient temperature is too low, fermentation may slow down.
- Weakened kefir grains: Over time, kefir grains can become weak or lose vitality, affecting their ability to ferment efficiently.
- Imbalance in milk-to-grain ratio: Using too many or too few kefir grains in proportion to the amount of milk can impact fermentation.
- Solutions to Speed Up Fermentation
To accelerate fermentation, consider the following remedies:
- Increase temperature: Move the jar to a warmer spot or use a brewing mat to provide gentle heat.
- Strengthen the grains: Revive weakened grains by following the steps outlined earlier.
- Adjust milk-to-grain ratio: Experiment with increasing the number of kefir grains or decreasing the amount of milk to create a more favorable environment for fermentation.
C. Off-Flavors in Kefir
- Causes and Remedies
If your kefir develops off-flavors or an unpleasant odor, it may be due to various factors, including:
- Contaminated equipment: Ensure that all equipment used for brewing kefir is clean and free from residual substances that could cause off-flavors.
- Over-fermentation: Leaving kefir to ferment for too long can result in strong, sour flavors. Adjust the fermentation time to achieve the desired taste.
- Excessive agitation: Vigorous stirring during fermentation can introduce excess oxygen and result in off-flavors. Stir gently and avoid unnecessary agitation.
To eliminate off-flavors, try the following:
- Thoroughly clean equipment: Ensure that all jars, utensils, and strainers are properly cleaned and sterilized before use.
- Reduce fermentation time: Experiment with shorter fermentation periods to achieve a milder flavor.
- Use gentle stirring: Avoid excessive agitation during fermentation to prevent off-flavors from developing.
VI. Enjoying Your Homemade Kefir
Now that you have successfully brewed kefir, it’s time to savor the delicious and nutritious results. Let’s explore different ways to serve and incorporate kefir into your diet.
A. Serving and Consuming Kefir
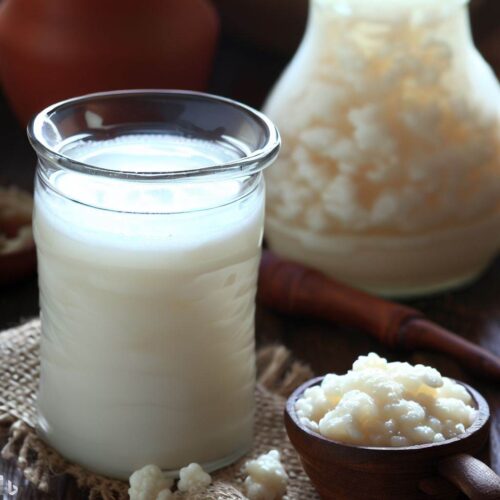
- Strained Kefir vs. Unstrained Kefir
When you strain the kefir, you obtain a smooth, pourable liquid. This strained kefir is perfect for enjoying on its own or incorporating into various recipes. Unstrained kefir, often referred to as “kefir with whey,” has a thicker consistency and can be enjoyed as a yogurt-like treat or used as a base for smoothies and desserts.
- Incorporating Kefir into Your Diet
There are numerous ways to include kefir in your daily diet:
- Enjoy a refreshing glass of kefir as a standalone beverage.
- Use kefir as a creamy topping for granola, cereal, or fresh fruit.
- Substitute kefir for buttermilk or yogurt in recipes for baked goods.
- Blend kefir into smoothies for a probiotic-packed breakfast or snack.
- Create creamy dressings or dips by combining kefir with herbs and spices.
B. Recipe Ideas Using Kefir
Let’s explore some recipe ideas that showcase the versatility of kefir:
- Kefir Smoothies and Shakes
Bougie Berry Smoothie:
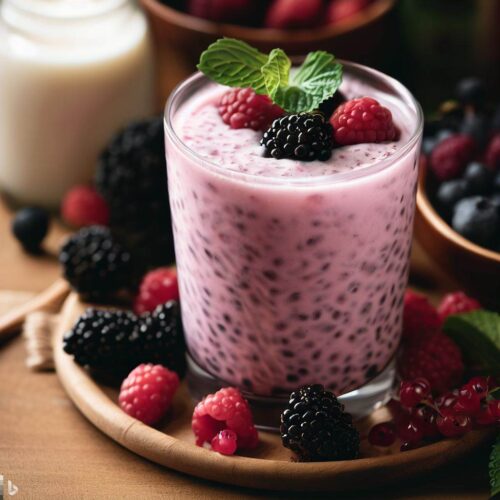
- Ingredients:
- 1 cup kefir
- 1 cup mixed berries (strawberries, blueberries, raspberries)
- 1 ripe banana
- 1 tablespoon honey
- Handful of ice cubes
- Instructions:
- Blend all ingredients until smooth. Adjust the sweetness by adding more honey if desired. Enjoy!
- Kefir-Based Dressings and Dips
Creamy Herb Dressing:
- Ingredients:
- 1/2 cup kefir
- 2 tablespoons extra-virgin olive oil
- 1 tablespoon lemon juice
- 1 garlic clove, minced
- 1 tablespoon fresh dill, chopped
- 1 tablespoon fresh parsley, chopped
- Salt and pepper to taste
- Instructions:
- Whisk all ingredients together in a bowl until well combined. Season with salt and pepper according to taste. Drizzle over salads or use as a dip for vegetables.
VII. Conclusion

Congratulations! You are now equipped with the knowledge and skills to brew your own kefir at home. From acquiring the kefir grains to the step-by-step brewing process, and troubleshooting common issues, you have learned the essentials of kefir brewing. With a little creativity and experimentation, you can enjoy a wide range of kefir flavors and incorporate this probiotic-rich drink into your daily routine. Cheers to a healthier gut and delicious homemade kefir!
FAQs

- Can I use kefir grains to ferment non-dairy milk?Yes, kefir grains can be used to ferment non-dairy milk alternatives like coconut milk, almond milk, or soy milk. However, it’s important to note that kefir grains thrive best in dairy milk and may require adjustment in the fermentation process when using non-dairy milk.
- Can I use flavored milk for kefir brewing?It’s best to avoid flavored milk for kefir brewing, as additives like sugars, artificial flavors, and preservatives can interfere with the fermentation process. Stick to plain, unflavored milk for optimal results.
- How often do I need to change the milk when storing kefir grains in the refrigerator?It is recommended to change the milk for stored kefir grains every 1 to 2 weeks. This ensures that the grains receive fresh nutrients and remain healthy and active.
- Can I freeze kefir grains for long-term storage?Freezing kefir grains is not recommended, as it can damage their structure and affect their viability. If you need to store kefir grains for an extended period, it’s best to use the refrigerator storage method mentioned earlier.
- What should I do with excess kefir grains?If you have an excess of kefir grains, you can share them with friends, family, or fellow kefir enthusiasts. Alternatively, you can dehydrate the grains for long-term storage or blend them into smoothies or purees for an added probiotic boost.
Thanks for Visiting Greek Mountain Kombucha and reading our Blog Post on: Kefir, How to Make it? Read on to other interesting articles from GMK:
- Comprehensive Kombucha Brewing Guide
- Shop Kombucha Brewing Supplies
- Jun Brewing Guide with Organic Honey!